Oil and water may not mix, but in the case of essential oils, they form a divine -- and useful -- combination. Extracted from leaves, fruit peels, petals, and other plant parts, essential oils capture nature's subtle fragrances and can even balance your mood, aromatherapists say.
Some, like peppermint and eucalyptus, are believed to be stimulating and uplifting; others, like lavender and frankincense, are considered relaxing and centering. These mists are the simplest way to experience aromatherapy for yourself. Spray the air around you, mist your hair and skin, or spritz them on linens to leave a light scent. (They won't stain.) Whether you're stressed or sluggish, one of these mists will suit your mood.
Ingredients
The Pick-Me-Up
1 drop eucalyptus (Eucalyptus globulus)
2 drops geranium (Pelargonium graveolens)
3 drops peppermint (Mentha piperita)
The Calm-Me-Down
2 drops bergamot (Citrus bergamia)
1 drop frankincense (Boswellia carteri)
3 drops lavender (Lavandula angustifolia)
To Make the Sprays
1. Fill a clean, dry mini spray bottle with 4 ounces of pure distilled water.
2. Using a dropper, carefully put the selected blend of essential oils directly into the spray bottle.
3. Tightly close the bottle and shake vigorously to combine. Be sure to shake it before each use, as the water and essential oils tend to separate.
Saturday, July 30, 2011
BLT Salad with Crostinia
1/3 cup fat-free mayonnaise dressing or salad dressing
4-tablespoons milk
3-tablespoons chopped oil-packed dried tomatoes, drained
1-clove garlic, minced
12-thin slices baguette-style French bread
6-cups torn mixed salad greens
3-plum tomatoes, seeded and chopped (1 cup)
1-small cucumber, halved lengthwise and thinly sliced
1/2cup cubed Muenster or mozzarella cheese (2 ounces)
8-slices turkey bacon, crisp-cooked, drained, and crumbled
Directions
1. For dressing, in a blender container or food processor bowl, combine mayonnaise or salad dressing, milk, dried tomatoes, and garlic. Cover and blend or process until tomatoes and garlic are finely chopped. Set dressing aside.
2. Place bread slices on a baking sheet. Bake in a 450 degree F. oven for about 5 minutes or until toasted. Turn slices over; spread with some of the dressing. Bake 3 minutes more; set aside.
3. Meanwhile, in a large bowl toss together salad greens, chopped tomato, cucumber, cheese, and bacon. Drizzle with dressing; toss lightly to coat. Serve with toasted bread slices. Makes 4 servings.
Tuna Focaccia
Ingredients
1-3-oz. pkg. cream cheese, softened
2-Tbsp. sweet red chili dipping sauce
2-small focaccia or four 6-inch pita bread rounds, halved and split
1-12-oz. can solid white albacore tuna (drained)
1-12-oz. bag frozen edamame blend vegetables (edamamame, corn and peppers), thawed
Asian Sweet Chili Sauce
Directions
1. In a small bowl combine cream cheese and the 2 tablespoons sweet red chili dipping sauce; spread inside of pita bread halves.
2. Flake tuna; combine in a medium bowl with vegetables; spoon into pita halves.
3. Pass additional red chili dipping sauce. Makes 4 servings.
Parade of Blooms
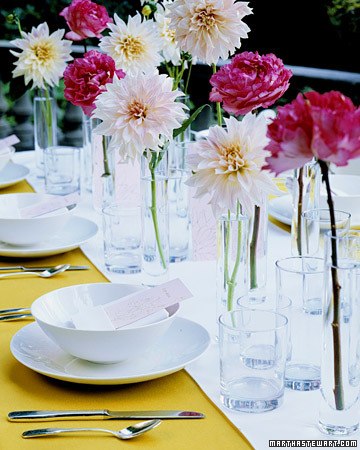
Delicate and airy, this centerpiece composed of single blossoms lets you make the most of a limited group of flowers. Showcase each one -- we used dahlias and garden roses -- in clear glass vessels, such as bud vases, jars, or even drinking glasses. To accentuate the arrangement, set the flowers on a runner with a hue that contrasts the color of the tablecloth.
Sand Centerpiece
Light up a table with this sand-and-shell centerpiece.Use candle adhesive to secure slender tapers to the bottom of a clear glass vase. Carefully pour in a few inches of sand, then arrange shells on top. Besides refracting the candlelight for added ambience, the vase will protect the flames from breeze.
Tropical Fruit Centerpiece
Set in a carved-out log, this edible centerpiece features an arrangement of melons, pineapples, and other tropical fruits. Orchids fitted into floral vials and citrus leaves are then tucked into the crevices.
Entertain with a Crudite Centerpiece
Create an hors d'oeuvre centerpiece that recalls a vegetable patch. Buy a large, deep galvanized-metal planter from a garden-supply center, line the bottom with sprouts, and pour in enough water to moisten them. Arrange vegetables, such as cherry tomatoes, carrots, radishes, asparagus, and cauliflower, in sections inside the container, varying the colors. Serve immediately with herb dip, or cover with moist paper towels and refrigerate up to 2 hours.
Sunday, July 24, 2011
Fresh Start
Transform your waste-of-space entertainment center into a handy, hardworking laundry station. After applying a fresh coat of paint, install a hanging rod in one of the tallest sections to function as storage and a place to drip-dry delicates. Baskets offer organized storage for ironing supplies and other necessities. A lazy Susan keeps cleaning supplies within reach.
Assemble your own makeshift library by stacking repurposed stools. Paint the three pieces in coordinating colors. This is a practical and affordable way to house your favorite reads
Sleeping Dogs Lie
Pamper your pooch by building a bed made from an unused side table. Remove the top and doors, then cut away any support pieces. After sanding rough edges, apply a fresh coat of paint that will complement your space. Finish by placing a fluffy dog pillow inside
Bookcase Buffet
Bookcase Buffet
When it comes to creating posh pieces of furniture for your dining room, think outside the box. Convert bookcases into a custom store-and-serve buffet. Using wall anchors, hang a pair of bookcases horizontally while placing a third on the floor directly below. Mount the middle bookcase at counter height so it can be used as a serving station for cocktails
Chic Tray
Couple an adjustable-height stool with an oversize tray to create a chic side table. Apply construction adhesive between the stool top and tray to permanently connect the objects
How to keep a Duvet Cover in Place
Although a duvet cover does an admirable job of protecting a comforter from stains, it is notorious for being a shifty character. Keep it and your comforter neatly in place by turning the cover inside out and sewing two pieces of five-inch-long fabric tape to all four corners. Then tie the fabric tape around each corner of the comforter, and sleep tight.
Thursday, July 21, 2011
Life Pictures
This is a pic of the lake that was just outside our camp site
Abby
Right down from that little embankment is the lake
Pics of William with his "first real haircut". OMG he looks years older LOL
Look at that face
Profile shot
Abby
Right down from that little embankment is the lake
Pics of William with his "first real haircut". OMG he looks years older LOL
Look at that face
Profile shot
Saturday, July 16, 2011
Creamy Fruit Sensation
3 tbsp orange juice
1/4 tsp. almond extract
1 pkg. (10 oz.) prepared prepared angel food cake, cut into 2-inch cubes
2 pkg. (1 oz. each) JELL-O Vanilla Flavor Fat Free Sugar Free Instant Pudding
2-1/2 cups cold fat-free milk
1-1/2 cups thawed COOL WHIP Sugar Free Whipped Topping, divided
2 pkg. (12 oz. each) frozen unsweetened mixed berries (raspberries, blueberries, sliced strawberries), thawed, well drained
Make It
MIX juice and extract. Drizzle over cake cubes in large bowl; toss to coat.
BEAT pudding mixes and milk in medium bowl with whisk 2 min. Stir in 1 cup COOL WHIP.
RESERVE a few berries for garnish. Place half the cake cubes in 2-qt. glass bowl; top with layers of half each of the remaining berries and pudding mixture. Repeat layers. Refrigerate 2 hours. Top with remaining COOL WHIP and reserved berries just
Chocolate Malted Mousse
2 oz malted milk balls
4 oz. milk chocolate, coarsely chopped
3 oz. bittersweet chocolate, coarsely chopped
3 cups whipping cream
1/3cup chocolate malted milk powder
2 Tbsp. chocolate liqueur, almond liqueur, or milk
1/2 tsp. vanilla
1 Tbsp. sugar
2 tsp. unsweetened cocoa powder
Malted milk balls (optional)
Directions :
1. Place the 2 ounces malted milk balls in large resealable plastic bag and finely crush with rolling pin. Set aside.
2. For mousse, in small saucepan heat milk chocolate and bittersweet chocolate with 1/4 cup of the whipping cream over low heat until smooth, stirring constantly. Stir in malted milk powder, liqueur, and vanilla. Cool to room temperature.
3. In large chilled mixing bowl with chilled beaters beat 1-3/4 cups whipping cream to stiff peaks (peaks stand straight). Stir about 1/2 cup of the whipped cream into melted chocolate mixture; fold chocolate mixture back into remaining whipped cream. Fold in crushed malted milk balls. Spoon into 1-1/2- to 2-quart dish or 8 to 10 small bowls or glasses. Cover and refrigerate 1 to 24 hours.
4. In medium chilled bowl combine remaining 1 cup whipping cream, sugar, and cocoa powder; beat to soft peaks. Spoon on mousse. Top with malted milk balls. Makes 8 to 10 servings.
Parsley Slaw
2 cups chopped Italian parsley
2 cups snow peas, blanched, halved
2 cups matchlike carrot sticks
4 green onions, finely chopped
12 small radishes, thinly sliced
1/3 cup KRAFT Asian Toasted Sesame Dressing
Zest and juice from 1 lime
2 Tbsp. sesame seed, toasted
Make It
COMBINE parsley and vegetables in large bowl.
MIX remaining ingredients; drizzle over salad
Chipotle Chicken Quesadillas
INGREDIENTS
3 tablespoons olive oil 1/2 red bell pepper, cut into thin strips 1/2 large onion, thinly sliced 1/2 cup frozen corn1 1/2 cups shredded cooked chicken,1cup shredded Monterey Jack cheese (2 oz)1tablespoon finely chopped chipotle chile in adobo sauce (from 7-oz can)2 tablespoons chopped cilantro 6 (8-inch) Old El Paso® flour tortillas6tablespoons Old El Paso® Salsa.
Directions
1 In 10-inch nonstick skillet, heat 1 tablespoon of the oil over medium-high heat. Add bell pepper, onion and corn; cook, stirring occasionally, 4 to 5 minutes or until bell pepper and onion is softened. Remove from heat; stir in chicken, cheese, chipotle chile and cilantro. 2 Brush one side of each tortilla with remaining 2 tablespoons oil. With oiled side down, spread 2 tablespoons salsa onto each of 3 tortillas. Spread about 1 cup of chicken mixture on each tortilla over salsa. Top each with remaining tortillas, oiled side up. 3 Heat 10-inch nonstick skillet over medium heat. Cook 1 quesadilla at a time 1 to 2 minutes on each side or until tortilla is golden brown and cheese is melted. Cut each quesadilla in half.
Gardening Apron
With nothing more than a needle, some thread, a few ribbons, and four buttons, you can revamp an old apron into a convertible one that frees up your hands to cut flowers. The pocket can also be used as a place to stash a pair of gardening gloves. To make it, fold up the bottom of the apron to make a 10-inch-deep pocket. Cut four 4-inch lengths of ribbon or twill tape. Fold them in half, and stitch the loose ends to the edge of the apron as shown, making loops. Sew on 4 large buttons in corresponding spots.
Better Water
Houseplants need a healthy diet, and you can help by giving them clean
water. Fill jugs with tap water, and leave the caps off for at least forty-eight hours. Some chlorine will evaporate, leaving purer water. As a result, plants will absorb nutrients more easily.
Monday, July 11, 2011
Stenciled Hallway Organizer
Banish prebeach pandemonium (Who took my towel? Where are my flip-flops?) with a designated station featuring boldly numbered hooks and corresponding cloth baskets for each guest or family member. Now if only there were a system for getting them to remember to put on sunscreen.
Tools and Materials
Waterproof paper, for stencils
Craft knife
Painters' tape
Small natural sea sponge
Latex and fabric paints
How-To
1.
To make stencils: On a computer, enlarge numbers in a font you like; print on waterproof paper. Cut out with craft knife.
2.
For wall, center stencils above hooks, and secure with painters' tape. Dip sponge in latex paint, blot excess, and dab on stencil. For baskets, use fabric paint. Proceed as above, but place a box or other hard object behind fabric for a firm work surface.
Button Hair Clip
Button Hair Clips
You'll want to fashion lots of these pretty hair clips (enough for friends -- and a few to keep). Using heavy thread, sew a button or two to the top of a colored bobby pin (for a flower, first sew button to a felt leaf). Stamp name on card stock, cut slit, and insert hairpin.
Thursday, July 7, 2011
Wednesday, July 6, 2011
Cheese Garlic Biscuits
2 cups Original Bisquick Mix
2/3 cup milk
1/2 cup shredded Cheddar cheese (2 ounces)
2 tablespoons butter or margarine
1/8 teaspoon garlic powder
1 Heat oven to 450ºF.
2 Stir Bisquick mix, milk and cheese until soft dough forms. Drop dough by 9 spoonfuls onto ungreased cookie sheet.
3 Bake 8 to 10 minutes or until golden brown. Stir together butter and garlic powder; brush over warm biscuits.
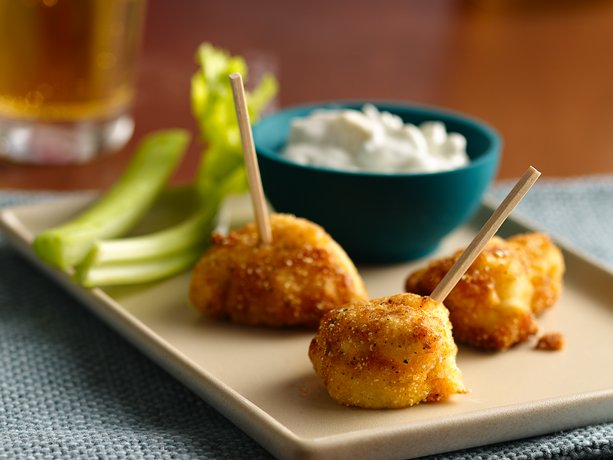
Buffalo Chicken Bites with Blue Cheese Dipping Sauce
1 egg white
1/3 cup hot Buffalo wing sauce
1 lb boneless skinless chicken breasts, cut into 40 (1-inch) pieces
3/4 cup Original Bisquick® mix
3 tablespoons cornmeal
1 teaspoon salt
1/2 teaspoon pepper
Vegetable oil
Dipping Sauce
3/4 cup crumbled blue cheese (3 oz)
6 tablespoons sour cream
6 tablespoons light mayonnaise
3 tablespoons milk
1 In medium bowl, mix egg white and Buffalo wing sauce. Stir in chicken. Cover; refrigerate 30 minutes.
2 Line cookie sheet with waxed paper. In large resealable food-storage plastic bag, place Bisquick mix, cornmeal, salt and pepper. With slotted spoon, remove 1/4 of chicken pieces from bowl and add to bag; seal bag and shake to coat. Repeat with remaining chicken pieces. Tap off excess Bisquick mixture and place chicken on cookie sheet.
3 In small bowl, mix dipping sauce ingredients until well combined. Cover; refrigerate until serving time.
4 In 10-inch nonstick skillet, heat oil (1/4 inch) over medium-high heat 2 to 4 minutes. Cook chicken bites in oil in batches, about 1/3 at a time, 3 to 4 minutes, turning once, until golden brown. Drain on paper towels. Serve chicken with dipping sauce.
Carrot and Zucchini Latkes
1 small onion
1/2 lb zucchini
1 lb peeled carrots
2 eggs, beaten
3 Tbsp. flour
1/2 tsp. salt
1/4 tsp. ground black pepper
1/4 cup oil
1/2 cup BREAKSTONE'S or KNUDSEN Sour Cream
1 Tbsp. chopped fresh chives
Make It
GRATE carrots, zucchini and onion using large holes of box grater; place vegetables on center of large clean kitchen towel. Bring up ends of towel and twist together to form pouch. Holding pouch over sink, squeeze out excess moisture from vegetables. Place vegetables in large bowl. Add eggs, flour, salt and pepper; mix well.
HEAT oil in medium nonstick skillet on medium-high heat. For each latke, carefully add 1 Tbsp. of the vegetable mixture to skillet, cooking 2 to 3 latkes at a time. Immediately spread each mound into thin circle with back of spoon. Cook 3 to 4 min. on each side or until golden brown on both sides. Remove latkes from skillet; drain on paper towels. Repeat with remaining vegetable mixture.
SERVE each latke topped with 1 tsp. sour cream. Sprinkle with chives
Flash Freeze
Here's a great way to chill beverages in time for an impromptu backyard barbecue. Place wine or other bottles in a bucket; add a layer of ice, followed by a layer of salt (coarse or table); repeat until you almost reach the top. Fill the bucket with cold water to just below the ice line. The water in the ice bucket will be colder than normal, chilling the libations in less than 10 minutes. We'll drink to that !!
Tuesday, July 5, 2011
Grilled Steak Bruschetta Salad
1-1/2 pounds beef tenderloin steaks (1 inch thick)
1/2 teaspoon salt
1/4 teaspoon pepper
6 slices Italian bread (1/2 inch thick)
3 cups fresh arugula or baby spinach
3/4 cup prepared bruschetta topping or vegetable salad of your choice
Crumbled blue cheese, optional
3/4 cup blue cheese salad dressing
Directions
Sprinkle steaks with salt and pepper. Grill, covered, over medium heat for 6-8 minutes on each side or until meat reaches desired doneness (for medium-rare, a meat thermometer should read 145°; medium, 160°; well-done, 170°). Let stand for 5 minutes.
Grill bread, covered, for 1-2 minutes on each side or until toasted; place on salad plates.
Thinly slice steak; arrange over toast. Top with arugula and bruschetta topping; sprinkle with cheese
Saturday, July 2, 2011
Kansas City BBQ Nachos
-
6 Cups triangle shaped corn tortilla chips
2 cups shredded Cheddar cheese (8 oz)
1 can (16 oz) spicy chili beans, undrained
1 container (18 oz) refrigerated seasoned shredded pork in original BBQ sauce
1/4 cup Old El Paso® pickled jalapeño slices, drained, chopped (from 12-oz jar)
1 cup tangy vinaigrette-style deli coleslaw, drained
2 medium green onions, sliced (2 tablespoons)
1 Heat oven to 400°F. Line 12-inch pizza pan or 15x10x1-inch pan with foil; spray with cooking spray. Spread half of chips evenly on pan. Sprinkle 1 cup of the cheese over chips.
2 In medium bowl, mix chili beans, pork and jalapeños. Drop half of mixture by small spoonfuls over chips. Repeat layers with chips, cheese and pork mixture.
3 Bake 12 to 15 minutes or until cheese is melted. Top with coleslaw and green onions
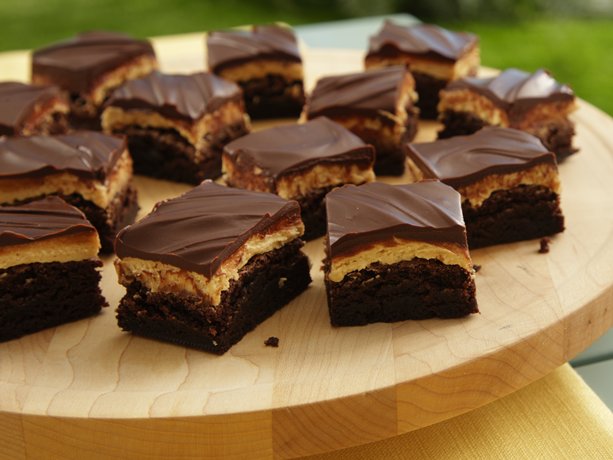
Peanut Butter Truffle Brownies
INGREDIENTS Brownie Base
1 box (1 lb 2.4 oz) Betty Crocker® Original Supreme Premium brownie mix
Water, vegetable oil and egg called for on brownie mix box
Filling
1/3 cup butter, softened
1/3 cup creamy peanut butter
1 1/3 cups powdered sugar
1 1/2 teaspoons milk
Topping
3/4 cup semisweet chocolate chips
3 tablespoons butter
1 Heat oven to 350°F (325°F for dark or nonstick pan). Grease bottom only of 8-inch or 9-inch square pan with cooking spray or shortening. (For easier cutting, line pan with foil, then grease foil on bottom only of pan.) Make brownies as directed on box. Cool completely, about 1 hour.
2 In medium bowl, beat filling ingredients with electric mixer on medium speed until smooth. Spread mixture evenly over brownie base.
3 In small microwavable bowl, microwave topping ingredients uncovered on High 30 to 60 seconds; stir until smooth. Cool 10 minutes; spread over filling. Refrigerate about 30 minutes or until set. For brownies, cut into 6 rows by 4 rows. Store covered in refrigerator
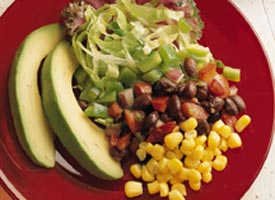
Layered Mexican Salad
1 1/2 cups shredded iceberg lettuce
1/3 cup chopped green bell pepper
2 cups black bean salsa
3/4 cup Green Giant® Niblets® whole kernel corn
1 medium avocado, sliced
Lime Vinaigrette
3/4 teaspoon grated lime peel
3 tablespoons lime juice
2 tablespoons chopped fresh cilantro
1/4 teaspoon salt
1 clove garlic, crushed
3/4 cup olive or vegetable oil
1 In medium bowl, layer lettuce, bell pepper, 1 1/4 cups of the salsa and the corn. Top with remaining 3/4 cup salsa and the avocado.
2 In food processor or blender, process all vinaigrette ingredients except oil until mixed. Gradually pour in oil, processing until thick. Serve vinaigrette with salad.
Portable Picnic Roll
.
How to Portable Picnic-Utensil Roll
With a few straight seams, a piece of fabric becomes a portable case for picnic cutlery. Unrolled, it doubles as a place mat. We used Japanese hemp yardage with a narrow selvage-to-selvage width (about 17 inches), so the sides didn't need to be hemmed. Other sturdy fabrics will work as well.
Tools and Materials
Square of fabric
Iron and ironing board
Sewing supplies
and sewing machine
Straightedge
Disappearing-ink fabric pen
Napkin and utensils
Twill tape
Portable Picnic-Utensil Roll How-To
1.
Lay fabric with selvage edges on the left and right sides. Fold up the bottom 1/2 inch; press with iron. Then fold up the bottom 5 inches to make a deep pocket; press with iron.
2.
Pin along the left and right sides of pocket. Stitch sides with an 1/8-inch seam allowance.
3.
Using straightedge and fabric pen, draw a few vertical lines on 1 side of pocket, about 1 1/2 inches apart. Leave a space on the other side of pocket wide enough to fit a folded napkin. Stitch along marked lines.
4.
Cut an 18-inch length of twill tape. Tuck 1 end under, and sew it to the right side of fabric at its midpoint.
5.
Fringe the top unfinished edge of fabric by pulling out a few threads.
6.
Insert utensils and napkin into slots. Roll fabric from the left, and tie with twill tape.
Car Trunk Organizer
Lighten your carload by arranging supplies in a handled bin. Items kept in the car have a tendency to roll around and get lost beneath seats, so it helps to organize them in a heavy vinyl catchall (available at home stores). Stock it with paper towels, a first-aid kit, auto fire extinguisher, duct tape, flat-repair kit, bungee cords, and a bag filled with flares, jumper cables, and other necessities. Also consider packing a messenger bag with bottled water, granola bars, a blanket, and warm clothing, in case of a breakdown.
Summer means lots of water, lots of swimming -- and a backpack for carrying things like towels and sunscreen to the beach or pool. Your child could use her school backpack, but why not make a fresh, pretty one -- you can even coordinate it with her bathing suit. Ours is washable and lined with water-resistant nylon, and it takes only an hour to complete.
Tools and Materials
Preshrunk cotton (one 14 1/2-by-32-inch rectangle)
Nylon (one 14 1/2-by-32-inch rectangle)
Pins
Cord (two 4-inch lengths,plus two 50-inch lengths)
Beach Bag How-To
1. Stack 14 1/2-by-32-inch rectangles of preshrunk cotton and nylon, right sides facing; pin and sew shorter ends together using 3/8-inch seam allowance. Turn inside out to hide seams.
2. Stitch across ends again, using 3/4-inch seam allowance, to create a channel. Fold end to end (nylon-side out); pin sides. For bottom loops, fold 4-inch cords in half; place inside the bottom corners, ends aligned with fabric edges. Stitch sides, catching ends of loops (do not sew channels closed). Starting on one side, thread each end of a 50-inch length of cord through each channel. Repeat from the other side.
3. Turn bag right side out. For straps, thread an end of each drawstring through the loop below it and tie ends
Pocket Knives and More
Keep silverware and napkins in one place for picnics and other meals on the go. Oilcloth is the ideal material for this pocket project; it won't fray, plus it can be wiped clean easily. Start with a 9-by-10-inch rectangle in your favorite pattern (we went with a mix of stars, stripes, and gingham). Fold in half vertically. Make a slightly diagonal slit, about 3 inches long, just above the midway point. Stitch the long side and bottom closed, about 1/8 inch from the edge. Leave the top open for napkins, and use the front pocket for utensils.
Happy 4th of July
Hope everyone has a fun and safe holiday.
Rubber Band ID
Your wineglass won't end up in the wrong hands when one of these brightly colored name tags identifies it. Use a permanent marker to write the name of a guest on a wide rubber band after placing it around a glass. Alternatively, you might use the bands as napkin rings that double as place cards.
Friday, July 1, 2011
"William Update "
Mom amd Me
"What laundry"?
"Faster Daddy"
First Otter Pop
"Look at my new Swing!!
"Boy, this is relaxing "
Grandpa and Me on our new lawn.
"What laundry"?
"Faster Daddy"
First Otter Pop
"Look at my new Swing!!
"Boy, this is relaxing "
Grandpa and Me on our new lawn.
Subscribe to:
Posts (Atom)